Create an account and set up kora
You sign up with your email address, then kora walks you through a short setup.
Create an account
Section titled “Create an account”-
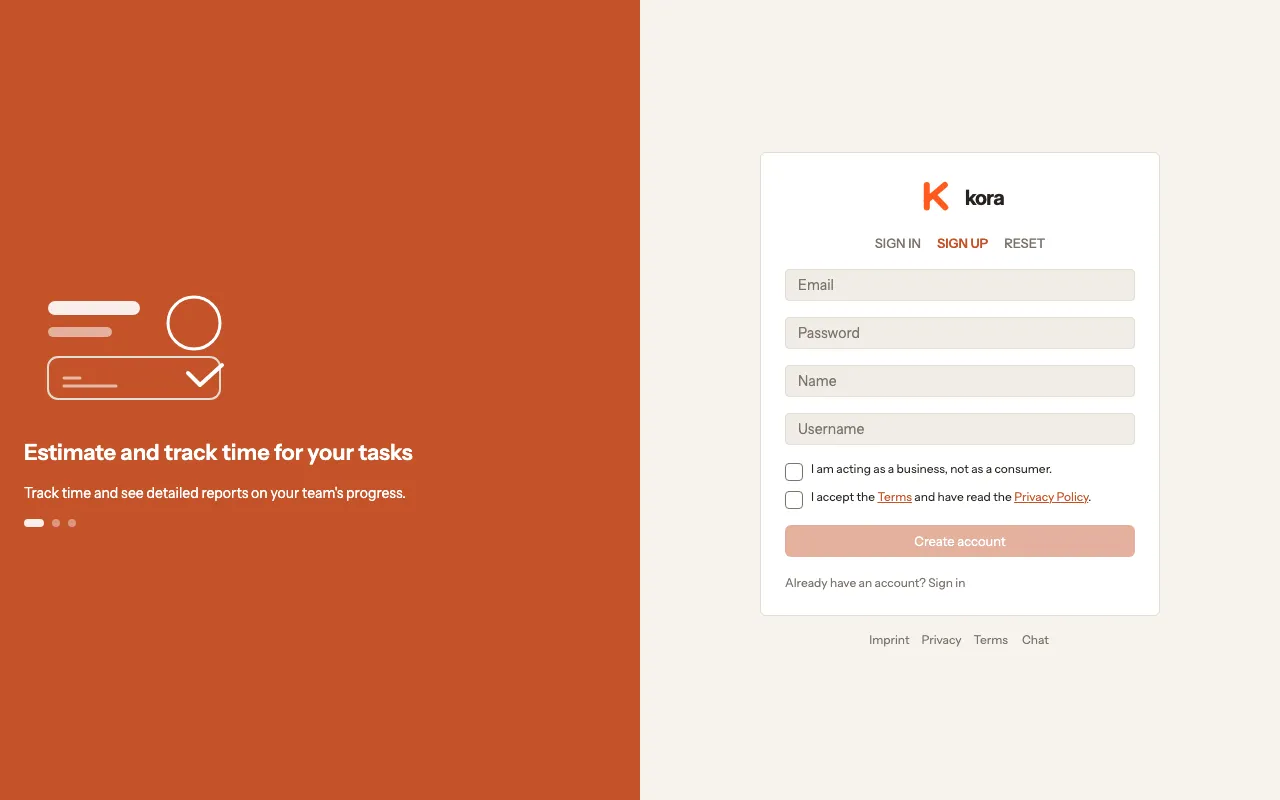
Open kora and switch to Sign up.
-
Enter your Email, Password, Name and Username.
-
Tick both boxes: that you are acting as a business, and that you accept the Terms and have read the Privacy Policy. kora is for businesses only.
-
Click Create account.
Confirm your email address
Section titled “Confirm your email address”- kora sends you an email with a confirmation link. Open the link.
- kora shows “Your email address is confirmed.”
Until then, kora shows a notice at the top. You can already work, but you cannot invite anyone or subscribe yet. No email arrived? Click Resend email in the notice.
Set up kora
Section titled “Set up kora”Right after signing up, the setup starts. It has up to three steps, and you can leave out any of them with Skip.
-
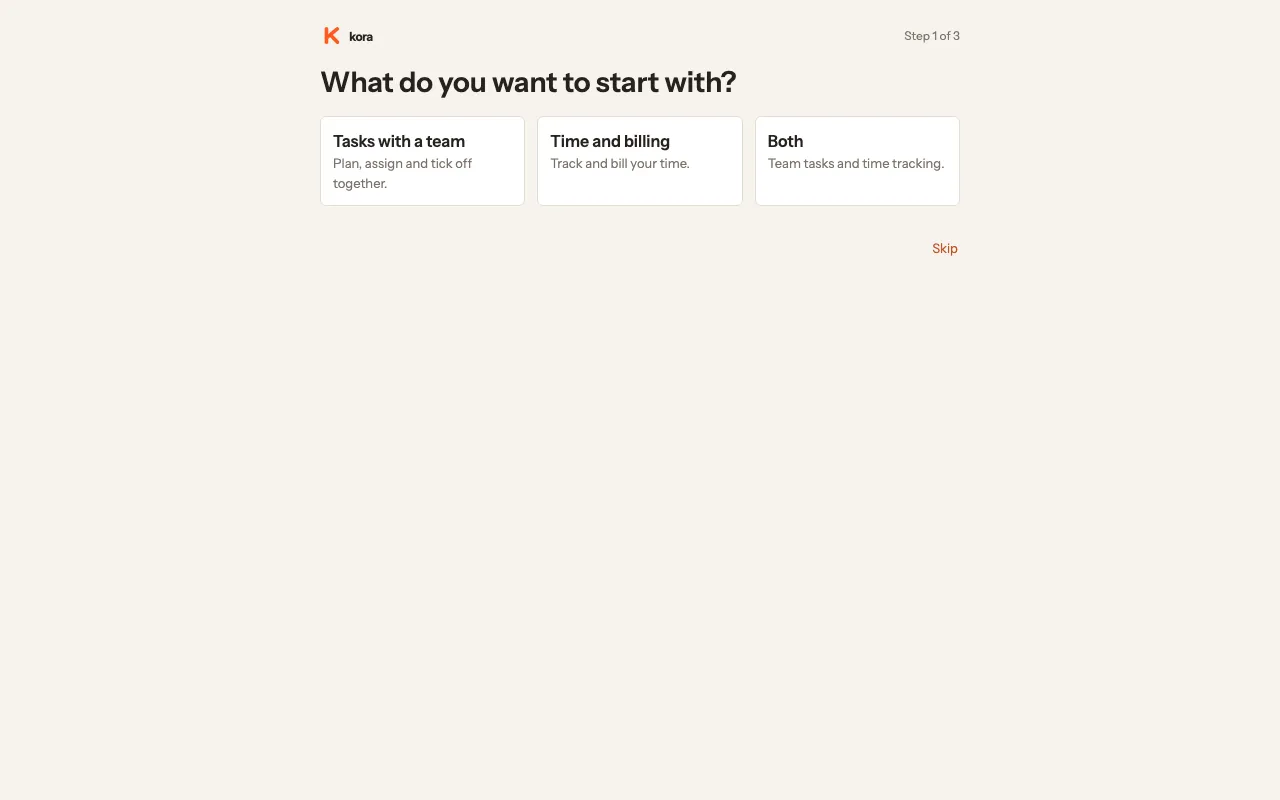
What do you want to start with? Choose Tasks with a team, Time and billing or Both.
-
What is your team called? You see this step for “Tasks with a team” and “Both”. Enter the name and click Next. kora creates an organization for your team.
-
Your first project: Keep the name or type your own. kora suggests a template that fits your answer; Other template lets you pick a different one. Click Create project, and kora opens your new project.
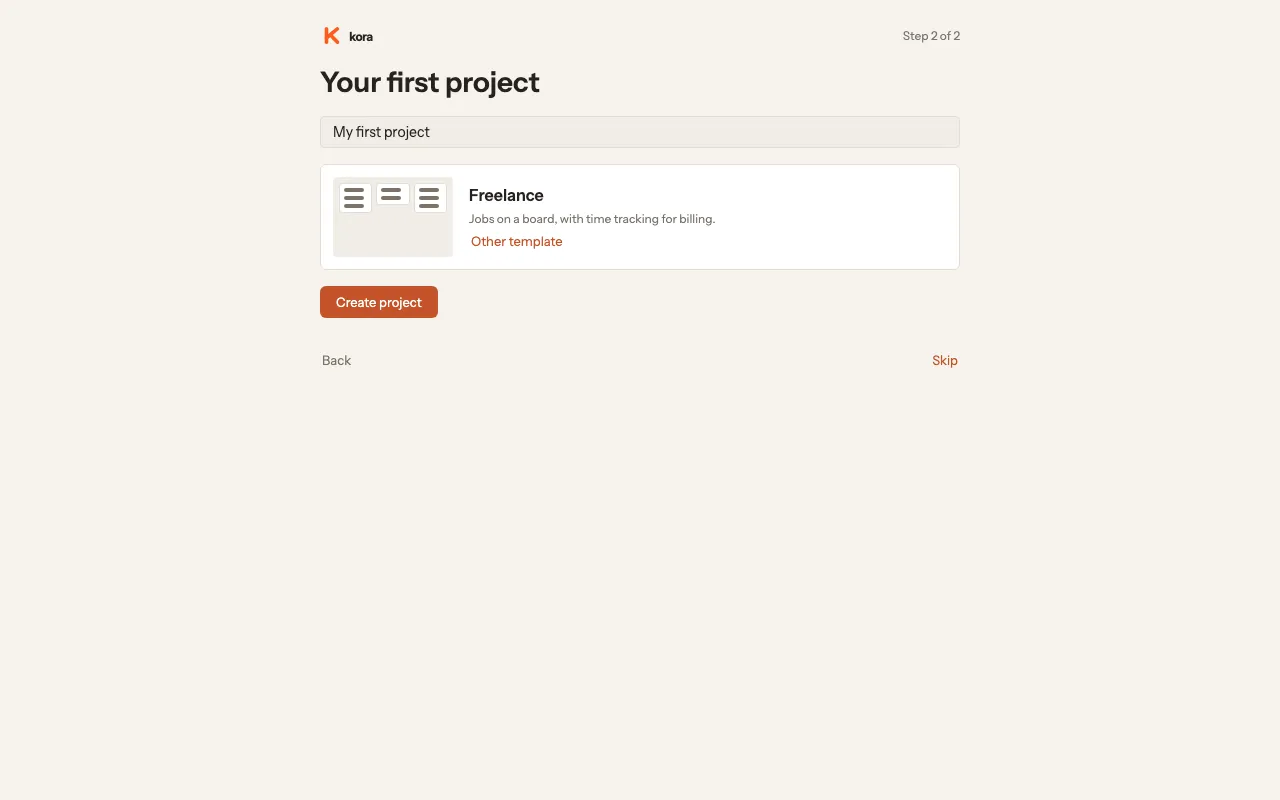
With “Time and billing”, the project goes into your Personal workspace, which only you can see.